Your cart
There are no more items in your cart
Dropshipping - Artwork
Here you will find help related to preparing artwork for our Dropshipping / Print-on-demand service
Compared to printing on white paper there are many challenges related to printing on garments, and whilst the basic principle of CMYK inkjet applies, that is where the similarities end.
Garments come in many colours, a variety of natural and synthetic fibres and have been died and treated in a variety of ways. There is no 'standard' substrate that we print onto like there is with paper, therefore designs can often look different when printed on different colours and products. On non-white garments, we print a white layer before adding the colour.
Why is artwork required in RGB?
Our printers print in CMYKRG+White, this allows the range of printable colours to be much wider than standard CMYK. The software which interprets the design file for printing in the CMYKRG+White format, therefore, requires the file to be in the RGB format, as a CMYK formatted image will limit the colour range. Artwork for Dropship DTG printing with GoCustom must always be submitted in RGB.
Colour profiles
Currently, there are no standard colour profiles for Direct To Garment printing.
What you see is not necessarily what you get!
A common mistake with printing is to expect that what you see on your screen is what you will get when it's printed. With the challenges highlighted above, you are unlikely to get an exact match. This image is an example of what you may expect vs what the print process can actually produce.

Can you match my colours exactly?
It's important to be aware that there will always be variations in the colours due to the issues mentioned above. If you are looking to print an exact Pantone reference, it's likely that the DTG printer will not match it exactly.
If you are looking to find the right colours to use in your design, it's worth having a sample printed of the colour swatch you wish to work with, along with lots of variations of each colour. When you receive that test garment you can decide which of the colours to actually use in your design, though note the colours can still vary between different products.
Digital printers cannot print certain colours, for example, neon colours, gold, silver etc. If you include these colours in your design, the printer will produce the closest match, but it will not represent your design very well. This is why we also always recommend you print a test of all new designs that you create.
If you are looking to produce very specific Spot colours or 100% guarantee your design is printed exactly the same every time on all products, it's likely that screen printing will be better for you. We cannot offer screen printing for dropshipping, though we do offer screen printing as a bulk ordering service.
Despite some unavoidable colour variation, the pros of direct-to-garment printing for dropshipping remain immense compared with other printing methods.
At GoCustom Clothing, we are continually seeking ways to enhance your experience and the quality of our print-on-demand fulfilment service. We understand that consistency in product quality is paramount to your business's success and brand reputation. As such, we are excited to announce a significant update to our Dropshipping platform, one that many of you have been eagerly anticipating – the introduction of automated scaling for design prints.
We are thrilled to let you know that on Monday, February 19, 2024, GoCustom Clothing will usher in a new era of precision and consistency in print-on-demand fulfilment with the official launch of our automated scaling technology. This significant upgrade is engineered to ensure your designs are presented accurately across all garment sizes, maintaining brand integrity, and supporting the premium look of your products.
Streamlined Consistency Across All Sizes
Until now, the artwork submitted to us has been printed at a uniform size across all garments. This one-size approach meant that designs on an XL t-shirt compared to an XS t-shirt could appear disproportionately sized, affecting the overall aesthetic and potentially diverging from your online product images. Our production engineers have been manually scaling down images to fit onto smaller garments; however, this manual process occasionally led to inconsistencies due to its inherent nature.

Note that scaling doesn’t apply to the following:
- Left/Right Chest positions
- Nape position
- Label position
- Embroidery designs
A Seamless Transition for Superior Results
To facilitate a smooth transition to this cutting-edge feature, we have made the automated scaling option available in your account settings as of today.
Here’s How It Works:
- Automated scaling automatically adjusts your designs to fit various garment sizes while maintaining the original proportions. This ensures that your designs retain their intended appearance from XS to XXL, enhancing customer satisfaction.
- If your preference is to keep your designs at a fixed scale without automatic adjustments, you may opt-out by switching off this feature in your account settings.
- Even with automated scaling disabled, our skilled engineers will continue to ensure that any artwork too large for smaller garments is manually adjusted.
- When automated scaling is activated, it applies to all apparel with Direct-to-Garment (DTG) print positions, streamlining your production process. Please note that this feature does not apply to embroidery.
- Scaling is only applied to garments which come with multiple size variations, it does not affect items such as mugs and bottles.
- Artwork will only be scaled down; we will never scale up the size of the artwork as this may degrade the quality of the printing.
Action Steps for GoCustom Partners
As part of our commitment to providing you with a user-friendly experience, we've ensured that the default setting for automated scaling is turned on for your convenience.
- If you wish for automated scaling to be applied to your designs, no action is required on your part.
- To opt-out of automated scaling, simply navigate to your account, visit the ‘My Designs/Products’ page and switch off the feature.

Your Success Is Our Blueprint
This advancement reflects our dedication to offering you a service that's not only efficient but also meticulous in detail, assuring that the quality of your merchandise is second to none.
At GoCustom Clothing, our innovation is driven by your feedback and our pursuit of excellence. Embrace the benefits of automated scaling and let us help elevate your brand to new heights.
By default, we now apply automated scaling to artwork: More
The following applies when automated scaling is switched off!
When you design a product, the artwork you create will be saved at the maximum print size we can produce based on your selected product and print area. In general, we will print artwork on all garments at the size you originally created it. However, when printing artwork onto smaller garments, the artwork may be scaled down in size to fit the product's dimensions while preserving the design's aspect ratio. Scaling down the artwork ensures that the design remains proportional and doesn't get distorted. Our expert printing team will always aim to print a garment that closely matches the mockup of your product. As all products across our range have different physical dimensions, because of this we do not set a standard scaling percentage and scale artwork on a case-by-case basis. This generally only affects garments sized S and XS.
It's essential to note that perfect scaling depends on the artwork's original resolution and quality. If the image's resolution is low, such as a pixelated or blurry image, scaling it down would not make it look better, and it might result in a blurry or distorted design. Therefore, it's vital to use high-quality artwork/designs to ensure that the scaled-down version looks great on any garment size.
How to Design for Embroidery
Embroidery allows for a high-quality and long-lasting finish, but you will need to put some thought into your designs before creating a range of garments to sell. Each new or altered embroidery design will incur a set-up fee, so it's good to prepare your designs with the following points in mind.
Embroidery is a maximum of 6 colours
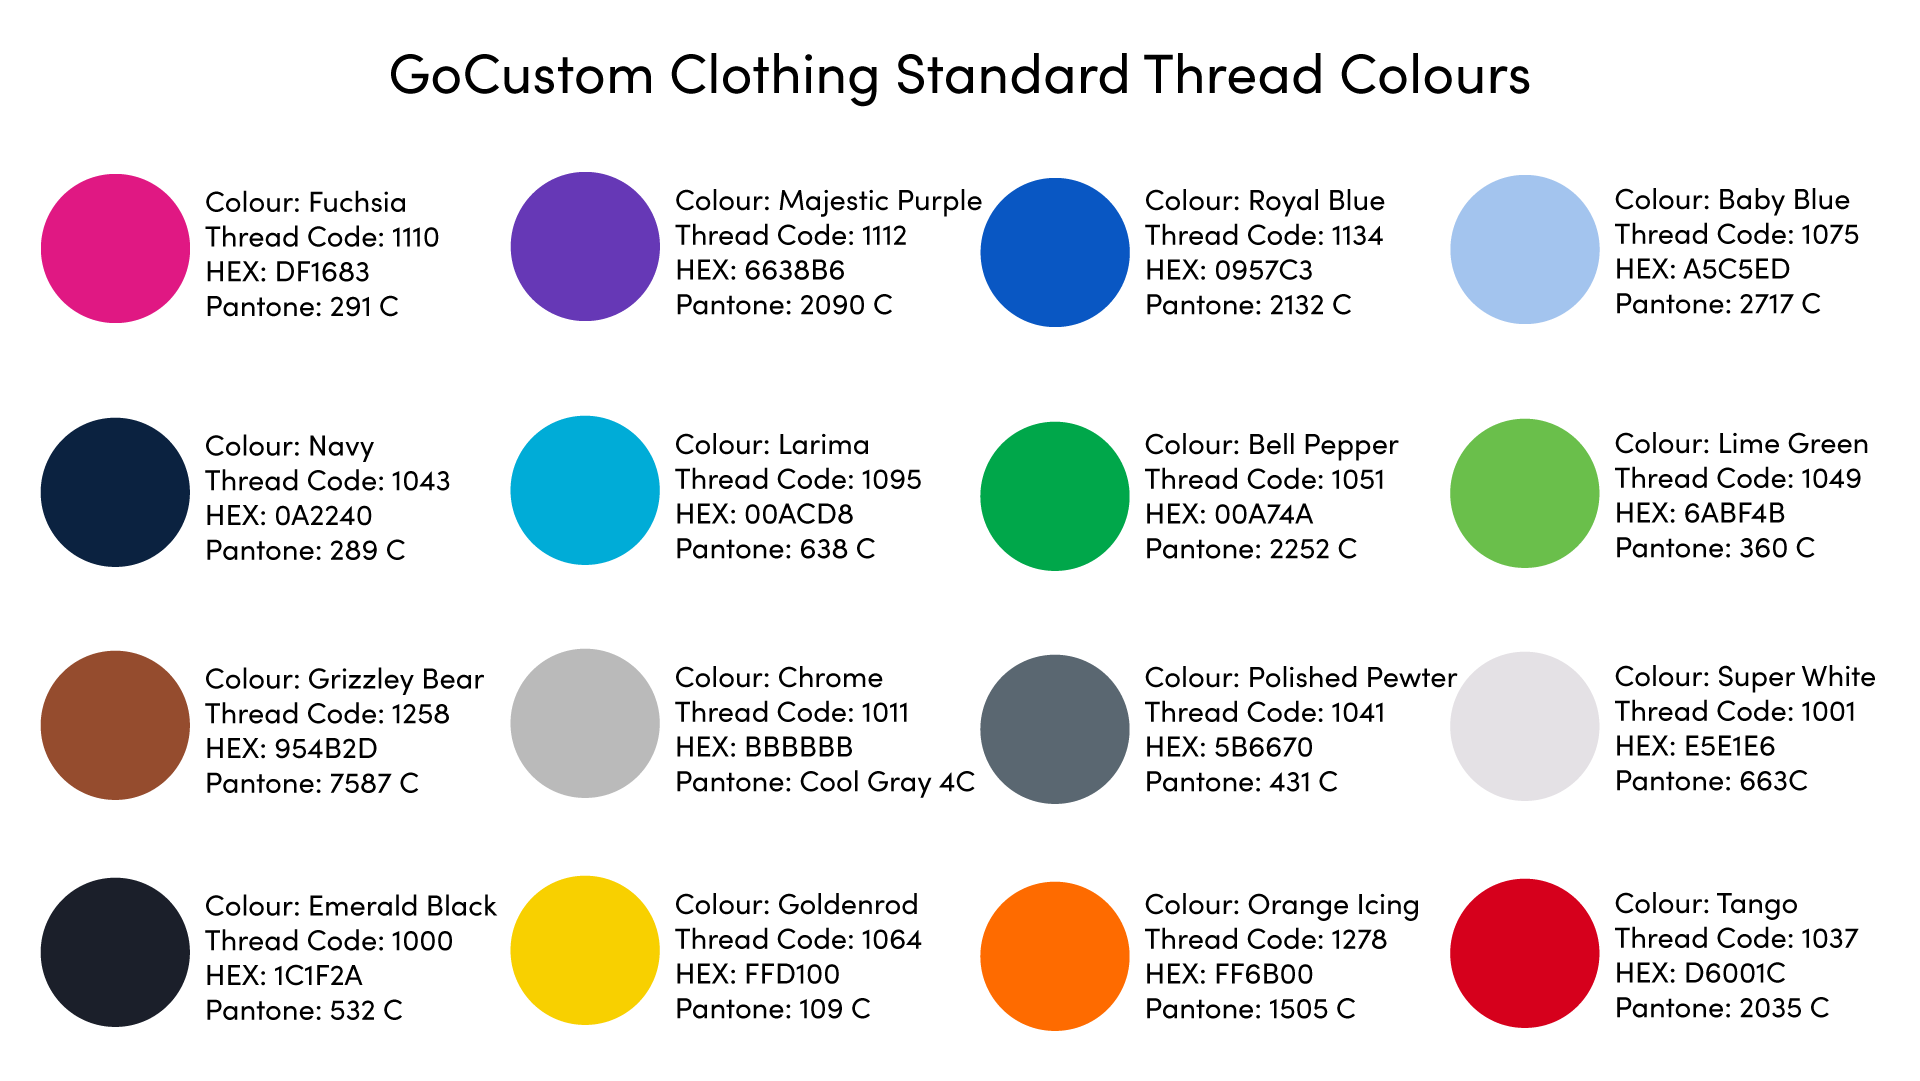
To ensure that your designs look their best on our products, we limit the number of colours that can be used in embroidery to a maximum of 6. This allows us to achieve optimal stitch quality and maintain clarity in your design. Our embroidery team has worked diligently to ensure that this limit does not significantly impact the overall appearance of your design. We believe that this will allow you to create stunning and high-quality designs for your customers.
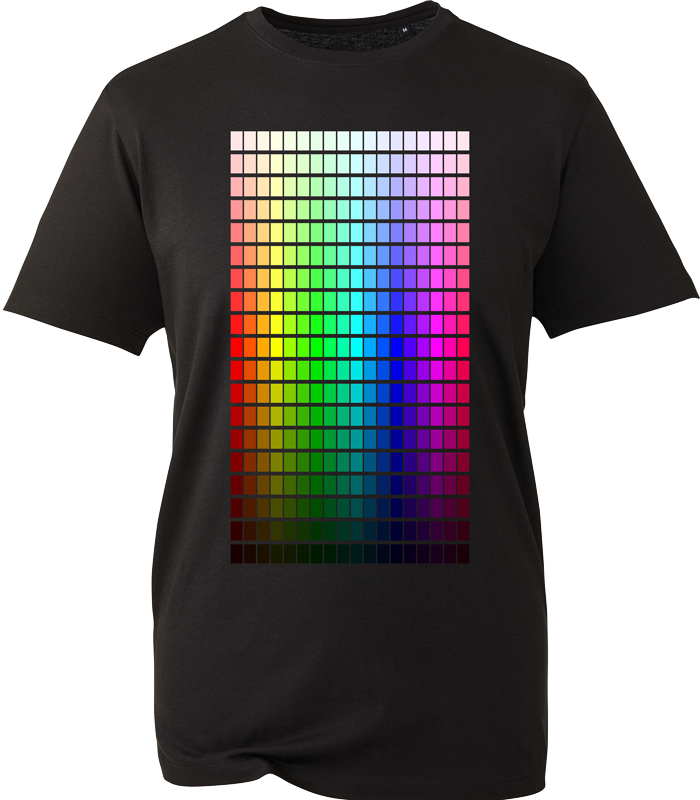
You can choose these colours from a selection of 16 vibrant threads. This selection has been curated to allow for the most common mix of colours normally found in embroidery.
You may find that colours do not exactly match your original design, the tool will try to match the thread closest to the colour you require.
Thin lines and tiny text
Designs with very small text or extremely thin lines may not translate well when embroidered onto fabric. To ensure the best results, it's recommended to use designs with larger text and bolder lines that can be easily replicated through embroidery. For text, we would recommend at least 5mm width for each letter. For lines, we suggest a minimum thickness of 1.25mm.
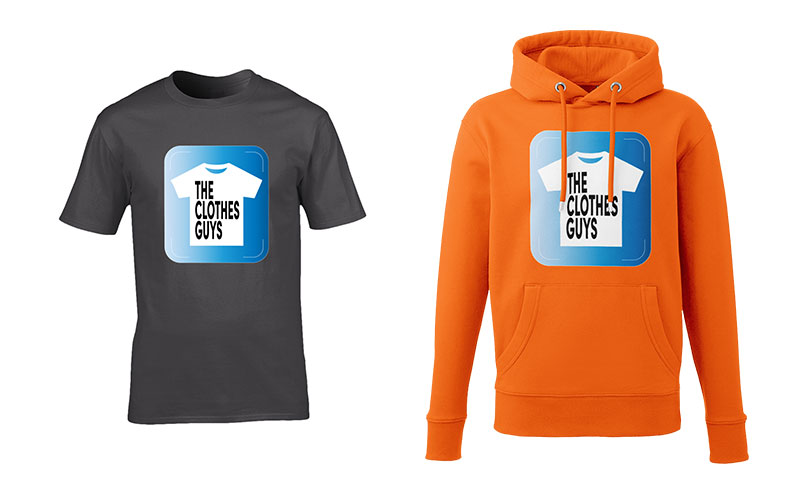
Choose your design carefully
The more simple your design, the more impactful it will be. Complex designs are unlikely to look good once embroidered.
For example, a photograph will not work well, remember you only have 6 colours for embroidery. Here are examples of how the less complex a design is, the more impactful the final result will be.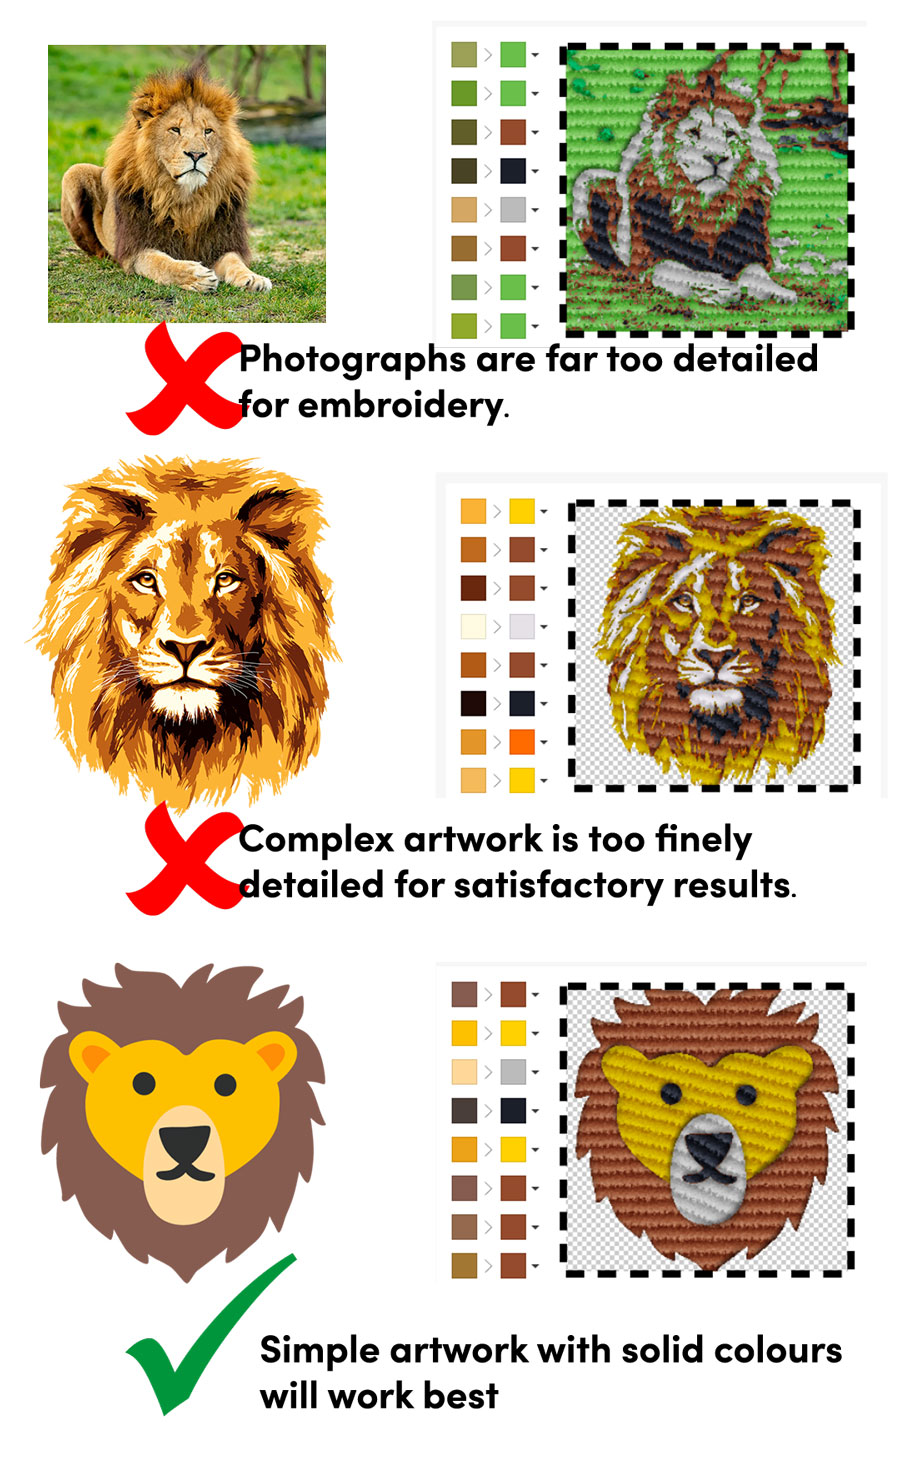
Match our thread colours
For the optimum designs, we suggest matching the colours in your artwork exactly with the choice of 16 colours we have available. This means that when you import your design it will match perfectly with our thread selection. Remember to set your artwork to only have 6 colours.
If you have any questions about setting up embroidery on your dropshipping products, please contact us.
Nobody wants to have their products created with low-quality prints, which makes us look bad, and you look bad in front of your customers.
When you use the garment designer our platform performs several checks to try and ensure that the artwork is suitable to print. You may see several warnings (which we will describe below), you can choose to ignore these warnings, but note you do this at your own risk. Our system asks you to accept the warnings in case you decide to continue. GoCustom is not responsible for the quality of the artwork you add to the system.
Image Types
The only file types which you can upload are PNG (best option) or JPG. If you try to upload any other file type you will receive a warning that it is not compatible.
PNG files will print best and will also include any transparency that you may have in your artwork. We recommend working in RGB colours for your artwork creation.
For the best output use our design templates which you can find on the 'Artwork Templates' tab on every product page.
PPI warnings
You may see warnings that your image is either 'Bad quality' or 'Average quality'.
When you upload an image, we check the PPI (Pixels Per Inch). We recommend that the artwork is uploaded as a 300 PPI PNG file. But it's not as simple as just saving your image at 300ppi, you should also pay attention to the size that you would like the artwork printing at.
The size is important as you want to avoid stretching the artwork to fit your required position on the canvas. For example, a 200 x 200-pixel image will look horrible when stretched the full width of a T-Shirt canvas (just over 4000 pixels), even if it is produced at 300ppi.
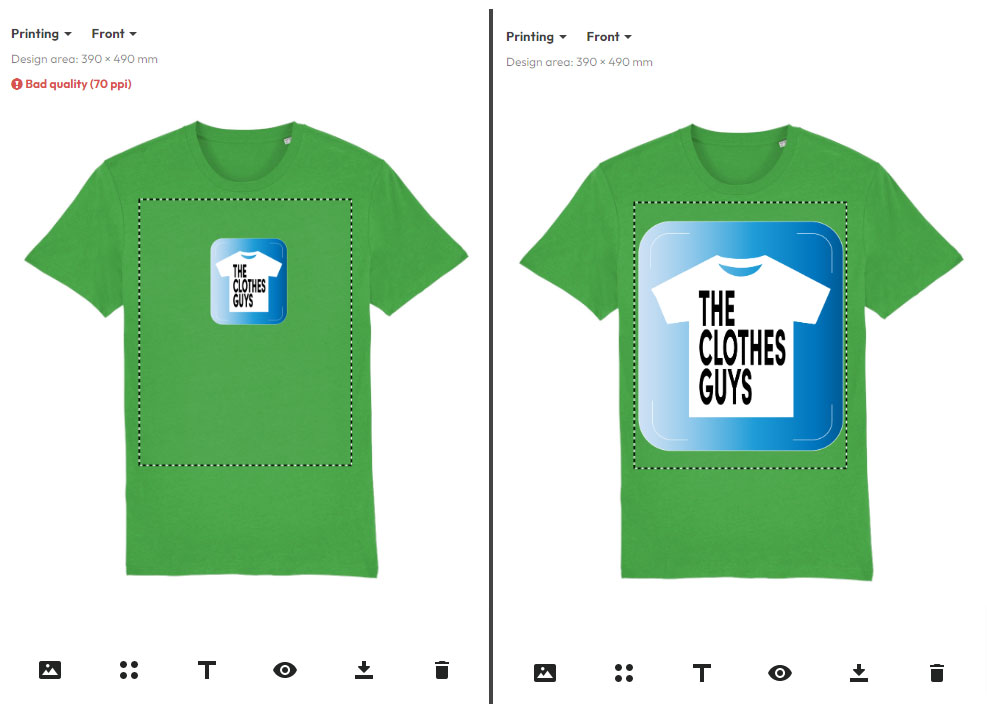
Take a look at the images above. The left shows an image uploaded which is only 400 pixels wide, this is showing the PPI warning. The right shows an image uploaded which is 4600 pixels wide, this is perfect for printing and does not show any warnings.
Scaling up your images
Don't fall into the trap of thinking you can open your image in photoshop and scale it up or save it with a higher PPI. Unless you are scaling up the original vector artwork, this isn't going to work.
Templates
The best way to ensure you create artwork that will print satisfactorily is to use our photoshop templates. On each product page, you will find a tab which includes an artwork template for the various print positions. Use these templates as a guide and output a png file from them.
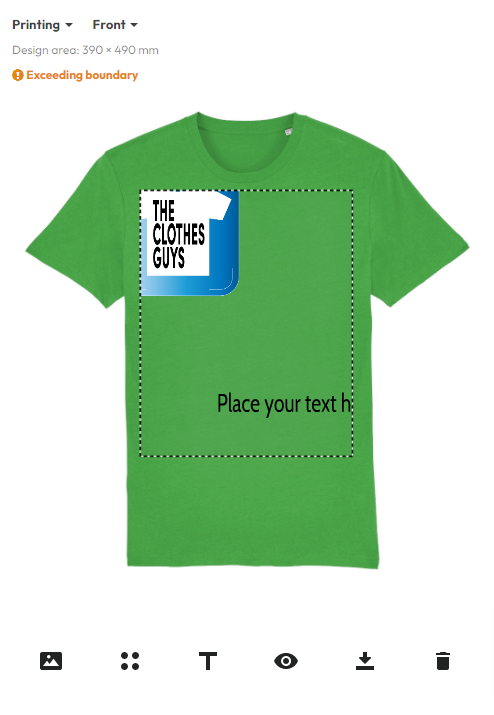
Exceeding boundary warnings
The dotted line shown on the garment is the printing area, if your text or images sit outside this area you will see a warning about the artwork exceeding the boundary. Always make sure that your items sit within the dotted line, otherwise, they will not be printed on your garments.
Accepting the warnings
When you have finished designing your product you will click on 'Create Product', at this point you will be presented with any remaining warnings. Clicking 'Continue' here means that you accept the artwork and are happy for us to print exactly what you have created.
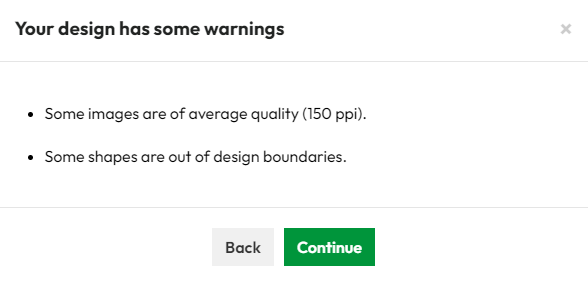
This acceptance is stored with your product, we cannot accept any issues if you are not happy with the print quality due to poor quality artwork.
Be advised that the mockups provided are exclusively digital representations of the final product, and therefore, there may be slight variations between the mockup and the finished product.
The mockup may not exactly represent the colour of the garment chosen, this is due to differences in colours displayed on screens and the technology we use to simulate your design overlayed over the garment.
If you wish to more accurately represent your products to customers on your website we highly recommend that you order samples and photograph your products.
When you export a selection of different coloured garments to your store, we will automatically create mockups for all positions in the first colour, but you will only find the front of the garment is automatically created for all the other colour variants.
The example from Shopify below shows the front and back for the Ash Grey colour, but only the front for the yellow.
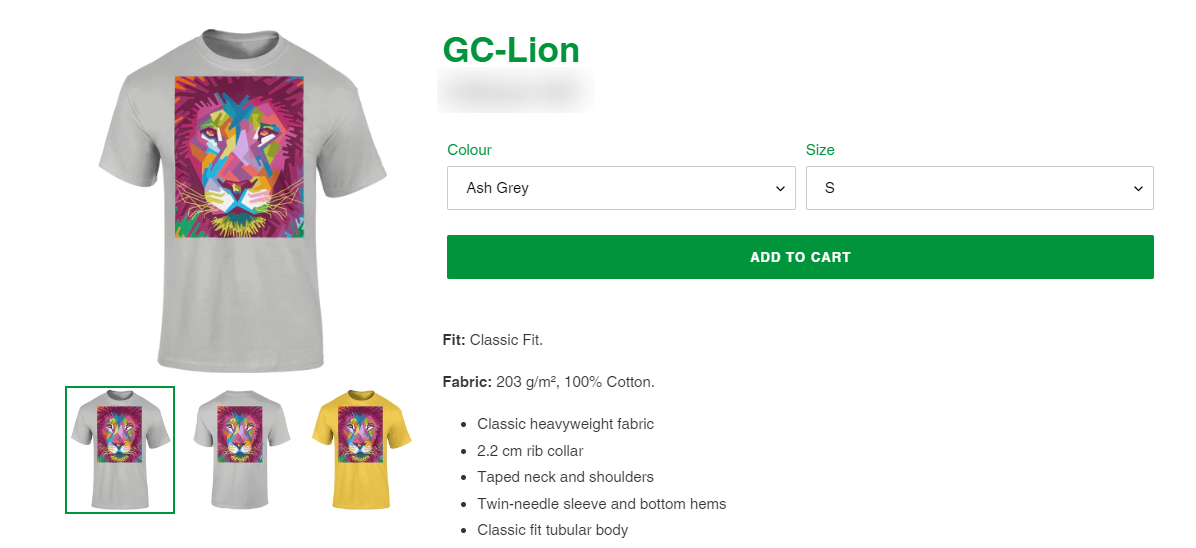
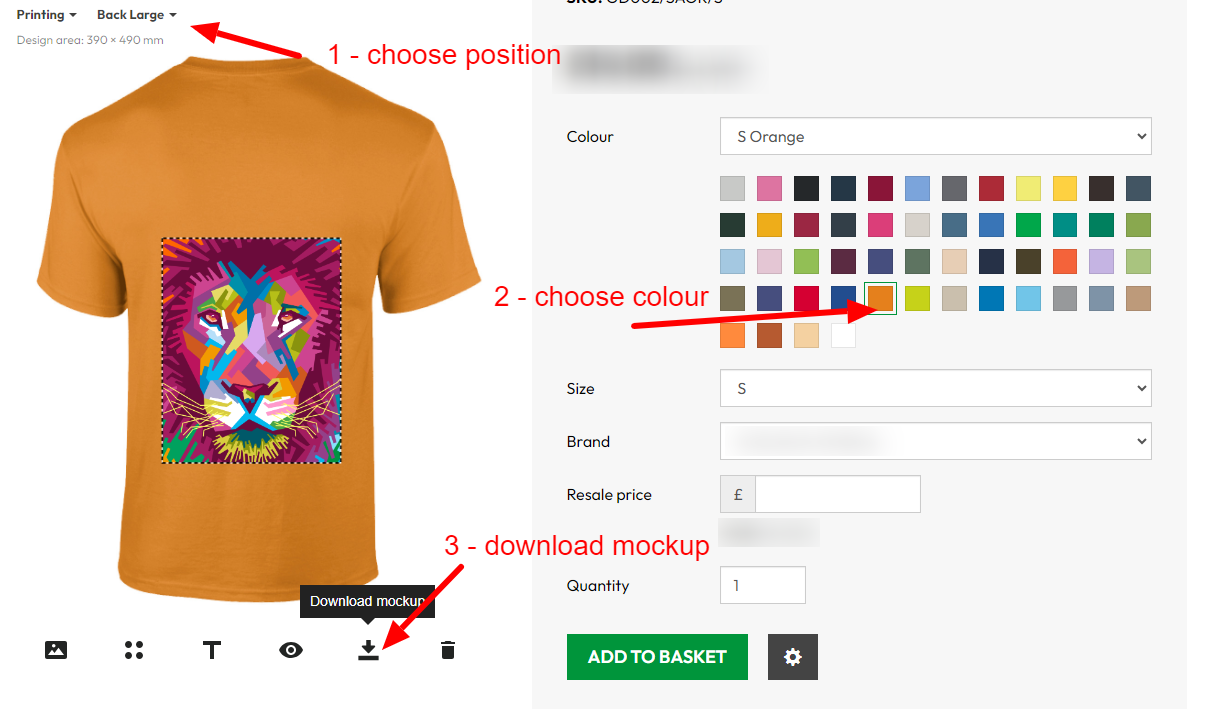
Most of the e-commerce platforms will allow you to manually add other images for each of the colour variants you wish to sell. You can do this by manually creating mockups from your products in your GoCustom account. Here is how to download mockups in any colour you choose.
In August 2023 we updated many products with improved printing positions. Any positions which have been replaced were re-named as 'Legacy' Positions. We will be completely removing the legacy positions after 30 November 2023, they should not be used for any new designs. We are asking that any designs you wish to continue using should be used on the new positions. This change has caused designs to potentially be shown in the wrong positions when you view the designs.
Any products which you had already exported to your stores prior to Aug 2023 will not be affected by this. But if you wish to place any manual orders with existing designs, or export again existing designs to your stores, you will need to check all the artwork is in the correct positions you expected. Please follow this video for more information.