Your cart
There are no more items in your cart
Dropshipping - Getting Started
Here we explain the first simple things you need to do in order to start dropshipping with GoCustom Clothing
Learn how simple it is to get started with GoCustom Clothing's print-on-demand platform. We will show you how to create an account, add your brand and build your first product.
Before you can create any products you will need to register for a dropshipping account.
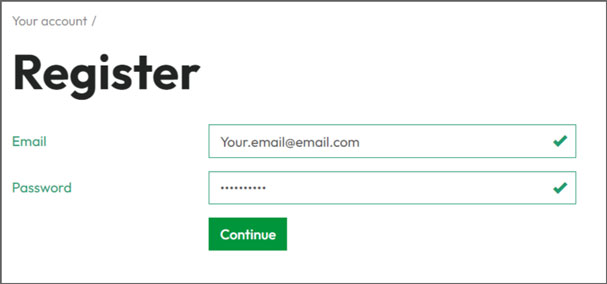
You will then be asked to supply your name and company details to complete your registration.
We will send you a welcome email that talks you through the next steps to complete your profile, integrate your stores and create your products.
Watch this video to learn how to integrate GoCustom Clothing's print-on-demand platform with your Shopify store. This integration requires you to install a Shopify app*.
*Not compatible with the Shopify Starter Plan, minimum requirement is the Shopify Basic Plan.
Shopify installation video
You must set up the correct weight-based shipping settings in your Shopify site so that we know how to ship your customer's orders and how to charge you the correct shipping amount. Follow the video below and look at the FAQs for more information and help.
Setting up Shopify weight-based shipping
Watch this video to learn how to integrate GoCustom Clothing's print-on-demand platform with your WooCommerce store. There is no plugin required to complete this integration.
You will then learn how to export a product you have designed to your WooCommerce store.
You must set up the correct weight-based shipping settings in your WooCommerce site so that we know how to ship your customer's orders and how to charge you the correct shipping amount. Look at this video and the FAQs for more information and help.
Watch this video to learn how to integrate GoCustom Clothing's print-on-demand platform with your Etsy shop.
Important
You must create an account with GoCustom Dropshipping before you attempt to connect to your Etsy shop. You will also need to have created an Etsy shop before attempting the connection.
Etsy installation video
Esty delivery profiles
It's important to make sure that delivery profiles (shipping charges) are set-up correctly in your Etsy store with GoCustom's shipping keywords.
The term “Etsy” is a trademark of Etsy, Inc. This application uses the Etsy API, but is not endorsed or certified by Etsy, Inc.
Watch this video to learn how to integrate GoCustom Clothing's print-on-demand platform with your TikTok shop. You could be selling your products directly from your TikTok videos in no time!
This integration requires you to have an approved shop account with TikTok UK, if you don't already have a TikTok Shop account please register here. Once you have an approved shop with TikTok you can progress to the next stage by watching the video below.
Aug 2023: TikTok has made changes that allow your customers to cancel an order within 1 hour without the need for you to authorise the refund. We have updated our system so that orders cannot begin to be processed until the 1 hour has lapsed. You therefore may not see your TikTok orders on our platform until the 'on hold' status is released from TikTok.
TikTok installation video
Setting up a TikTok shipping template for weight-based shipping
TikTok currently allows only one shipping method with this integration. Therefore all items sold through the TikTok integration will be delivered with our Royal Mail Standard 48 service. You can charge whatever you like for shipping (even give it for free), but we will charge you the shipping rate relevant to the weight of your orders.
TikTok requires you to set up one weight based shipping template
It is free to create a GoCustom account, integrate your store using our e-commerce integrations and create products.
The only set-up charge we have relates to when you require embroidery. For every new or altered embroidery design, there is a set-up charge of £15+vat. This is only charged once per design/alteration. When you add or alter an embroidery we will contact you separately to request payment of the set-up charge.
Integrations to the supported platforms are designed to be straightforward to implement, though you may find you require some assistance with setting up your store, such as your shipping options. GoCustom Clothing is not able to assist you with your chosen e-commerce platform, our services apply only to the GoCustom platform and associated apps.
GoCustom reserve the right to discuss fees where we must provide in-depth onboarding services.
Before you create any products, you must set up at least one brand. You can add several brands to your profile.
The brand you create allows for specific elements to be assigned, including your logo, colour and various settings for your branded packing slips.
Start creating your brand by going to the 'my brands' page and selecting [Add new brand].
You will need to provide a brand/company name and upload your logo. This logo will be printed on packing slips.
You will then be asked to supply customer service details - this is essential as your customers will not be able to contact GoCustom if they have any issues, they will need to contact you.

On the same page, you will also define the main colour for your brand and other information to personalise your brand packing slips. This information is optional but leads to a much better brand experience for your customers.
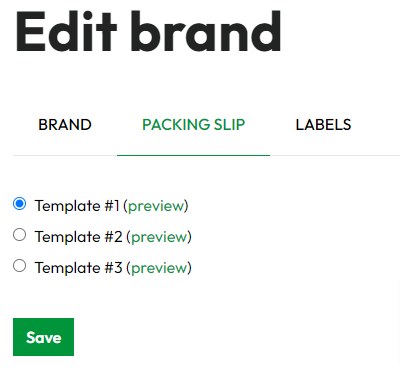
Packing Slip
There are 3 layout templates for you to choose from to create your packing slip. You can preview each layout. Select the radio button next to your chosen layout and press save. Now all your orders will be sent with the chosen packing slip included.
Example packing slip (these are printed on A4 Paper)

Labels
These are entirely optional items which are charged extra. These are covered in a separate FAQ
To create your first product, head to the Products page, select a product, upload and position your design and select the [Create product] button.
Watch the video below for a demonstration of using the product designer.
The Designer
The product designer has several tools at your disposal.
You can view all the different positions available for customisation (e.g. Front, Rear, Nape). This differs from garment to garment.
Your design for each position can combine multiple images and text, but must be within the dotted boundary line.
The toolbar provides 6 tools which offer great flexibility when designing your products.
- Upload an image (see artwork requirements below).
- Use an existing design (you can copy an existing saved design to a new product).
- Text editor - a flexible editor with a choice of fonts and styles.
- View a rendered mockup of your design.
- Download the mockup (useful for marketing material or to add to your website).
- Removes all of the designs currently applied to the position you are viewing.

Save your product
Once you have finished designing your product you need to save it. Failing to save your product means that you won't be able to export it to your store.

To save your product click on the [CREATE PRODUCT] button.
At this point the size and colours of the garment are not important, we will do that later when you export the product to your integrated store.
You can also manually order a product from this screen by choosing [ADD TO BASKET] - especially useful if you would like to order a sample.
Our Shopify integration is built for full e-commerce websites on the Shopify platform. For the integration to work correctly, you will need a minimum of the Shopify Basic Plan.
At this time we do not support the Shopify Starter Plan.